The Linux Boot Process: A Simplified Overview for Beginners
Starting a computer running Linux might seem like a simple press of a button, but beneath the surface, a complex and fascinating sequence of events unfolds. This sequence, known as the Linux boot process, is a series of necessary actions that take your system from a powered-off state to a fully functional operating environment where you can log in and start working. Understanding this process is incredibly valuable for beginners, especially when troubleshooting startup issues or diving deeper into how your Linux system works.
Think of the Linux boot process as a relay race with multiple runners, each passing the baton to the next until the finish line is reached. While the specifics can vary slightly depending on your hardware (like BIOS vs. UEFI) and the Linux distribution you’re using, the core stages remain consistent. This guide simplifies these stages into four main steps, based on common descriptions of the Linux startup sequence.
What Happens When You Press the Power Button?
The very first moment you power on your machine, the system hardware comes to life. This is the initial phase, where the basic components are checked and initialized before the operating system even gets a look in.
## Stage 1: System Startup (BIOS/UEFI)
This stage is handled by the firmware on your computer’s motherboard, either the traditional Basic Input/Output System (BIOS) or the more modern Unified Extensible Firmware Interface (UEFI).
1. Power-On Self-Test (POST): When power is applied, the BIOS or UEFI runs a series of diagnostic tests to ensure that essential hardware components like the CPU, RAM, and graphics card are working correctly. If there are critical issues, you might hear beeps or see error messages on the screen.
2. Finding the Boot Device: After POST, the firmware looks for a bootable device. This could be a hard drive, SSD, CD-ROM, USB drive, or even a network location, based on the boot order configured in the firmware settings.
3. Loading the First Piece of Code:
* On older BIOS systems: Once a bootable hard disk is found, the BIOS reads the very first sector of that disk. This sector is typically the Master Boot Record (MBR). The MBR contains a tiny piece of code known as the *first-stage bootloader* and a partition table. The BIOS loads this first-stage bootloader into a specific memory location and executes it.
* On newer UEFI systems: UEFI is more advanced. It can read file systems and execute bootloaders stored as files on a special partition called the EFI System Partition (ESP). UEFI loads a boot application (which could be a bootloader like GRUB2 or systemd-boot, or sometimes even the Linux kernel directly if it’s configured with an EFI boot stub) from the ESP into memory and executes it. UEFI also handles Secure Boot, which verifies the digital signatures of boot components to prevent malicious code from hijacking the startup process.
## Stage 2: The Bootloader
This is where the real work of loading the operating system begins. The first-stage bootloader (from the MBR or UEFI) is usually too simple to load the entire operating system kernel directly. Its main job is to find and execute a more capable boot program, often called the *second-stage bootloader*.
* Common Bootloaders: In the Linux world, the most prevalent bootloader today is GRUB (Grand Unified Bootloader), specifically GRUB2. Other historical or specialized bootloaders include LILO, SYSLINUX, Loadlin, systemd-boot, coreboot, and Das U-Boot (common in embedded systems).
* Finding the Kernel: The second-stage bootloader understands the complexities of file systems (like Ext4, XFS, etc., used by Linux) and knows where to find the Linux kernel image file on the hard drive.
* Offering Choices: Many bootloaders, especially GRUB2, present a boot menu. This menu allows you to choose which operating system to boot (if you have multiple installed) or select different versions (or “kernels”) of Linux. This is useful if a newer kernel is causing problems and you need to boot into an older, working one.
* Loading the Kernel and `initramfs`: Once you select an option (or after a timeout), the bootloader loads the selected Linux kernel image and an initial RAM filesystem (`initramfs` or `initrd`) into the computer’s RAM.
The bootloader is absolutely crucial because it bridges the gap between the minimal environment provided by the firmware (BIOS/UEFI) and the more complex requirements of loading the operating system kernel.
## Stage 3: The Kernel
With the kernel and `initramfs` loaded into memory by the bootloader, control is passed to the Linux kernel itself. This is arguably the core of the Linux boot process.
1. Kernel Initialization: The kernel starts executing. It begins by initializing itself, decompressing if necessary, and performing essential setup tasks.
2. Hardware Detection and Initialization: The kernel probes and initializes the hardware components of your system (CPU, memory, storage controllers, network interfaces, etc.). It loads necessary device drivers to interact with this hardware.
3. Mounting the Root Filesystem: The kernel needs access to the main operating system files, which reside on a storage device. It uses the `initramfs` (which is essentially a minimal temporary root filesystem loaded into RAM) to help it find and mount the *real* root filesystem from your hard drive or SSD. The `initramfs` contains necessary tools and drivers to access the primary storage.
4. Loading Modules: The kernel loads additional modules (drivers and kernel components) that are needed based on the detected hardware and system configuration.
Once the kernel has successfully mounted the root filesystem and initialized the necessary hardware, it’s ready to hand over control to the first *user-space* process.
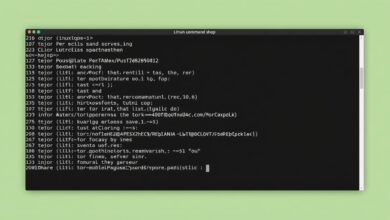
[Hint: Insert image/video showing the Linux kernel messages scrolling during boot]## Stage 4: The Init Process
This is the final major stage of the Linux boot process, transitioning from the kernel’s low-level operations to setting up the user environment. The kernel starts the very first process in user space. Traditionally, this process was called `init` (from “initialization”), and it had a Process ID (PID) of 1.
Today, many modern Linux distributions use `systemd` as the init system, which is much more than just the first process. It’s a comprehensive system and service manager. Other init systems like SysVinit or Upstart are still used in some contexts.
Regardless of the specific init system:
1. PID 1 Takes Over: The init process (systemd, SysVinit, etc.) becomes the parent of all other processes on the system.
2. Executing Startup Scripts/Units: The init system reads configuration files (like `init.d` scripts for SysVinit or `.service` units for systemd) to determine which services, daemons (background processes), and system configurations need to be started. This includes things like:
* Setting up network interfaces
* Starting logging services
* Starting the SSH daemon (for remote access)
* Mounting other filesystems (like `/home`, `/var`)
* Starting graphical display managers (if you’re not booting to a command line)
* Setting the system hostname and timezone.
3. Reaching the Target/Runlevel: The init system works towards a specific target or runlevel, which represents a desired state of the system (e.g., multi-user command line, graphical desktop).
4. Presenting the Login Prompt: Once all necessary services for the target runlevel are started, the system is ready for user interaction. The init system launches a login prompt (either on a virtual console or a graphical login screen).
At this point, the Linux boot process is complete. You can log in, and the system is fully operational.
## Why Understanding the Boot Process Matters
Knowing the stages of the Linux boot process provides a roadmap for diagnosing problems. If your system doesn’t boot, knowing which stage failed (e.g., BIOS POST error, bootloader menu doesn’t appear, kernel panic messages, services failing to start) helps you pinpoint the cause. It also gives you insight into how your system is structured and managed from the ground up. For example, understanding the role of systemd helps you manage services after the system is running. Learn more about managing processes and services in Linux with tools like `systemctl` [here](/demystifying-linux-systemd-a-practical-guide-to-processes-and-services).
The journey from pressing the power button to getting a login prompt is intricate but logical. Each stage builds upon the previous one, performing specific tasks essential for bringing the operating system to life. While this overview simplifies some of the deeper technical details, it provides a solid foundation for beginners to understand the fundamental mechanics of starting a Linux machine. For more detailed information on specific boot components, you can refer to resources like the Wikipedia page on the Linux booting process.
Conclusion
The Linux boot process is a carefully orchestrated sequence involving firmware, bootloaders, the kernel, and the init system. By breaking it down into these core stages – System Startup, Bootloader, Kernel, and Init Process – beginners can gain a clearer picture of what happens behind the scenes every time they power on their Linux computers. This knowledge is not just academic; it’s a practical skill that empowers you to better understand, manage, and troubleshoot your Linux system.
