Your First Server: A Beginner’s Guide to Installing a Server Operating System
Setting up your first server can seem daunting, but it opens up a world of possibilities, from hosting websites and managing files to running game servers or home automation systems. A crucial first step is installing a server operating system (OS). This guide will walk beginners through the essential considerations and steps involved, helping you choose and install the right server OS for your needs.
Unlike the operating system on your desktop or laptop (like Windows 11 or macOS), a server OS is specifically designed to handle background tasks, manage network resources, and provide services to other computers reliably and efficiently. Choosing the correct one is fundamental before you begin the installation process.
Before You Begin: Hardware Matters
Before you even think about installing a server operating system, you need hardware! While you can repurpose an old desktop, consider these factors for a dedicated server:
- CPU (Processor): Doesn’t always need to be top-of-the-line, but should be adequate for your intended tasks (e.g., file storage vs. intensive application hosting).
- RAM (Memory): Crucial for performance. 4GB is a bare minimum, 8GB+ is recommended for most basic tasks, and 16GB+ is better for more demanding applications or virtualization.
- Storage (Hard Drive/SSD): Consider both capacity (how much data you need to store) and speed (SSDs offer significantly faster performance than traditional HDDs). Reliability is also key; consider RAID configurations for redundancy if uptime is critical.
- Network Connection: A stable wired Ethernet connection is generally preferred over Wi-Fi for servers.
Ensure your chosen hardware is compatible with the server OS you plan to install.
[Hint: Insert image/video comparing server hardware components here]Choosing Your Server OS: Windows vs. Linux
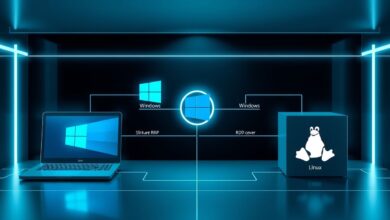
The two main contenders in the server OS world, especially for those starting, are Windows Server and various distributions of Linux. The best choice depends heavily on your goals and familiarity.
Windows Server
Microsoft’s server offering (e.g., Windows Server 2019, 2022) provides a familiar graphical user interface (GUI) for those used to standard Windows.
- Pros: Easier learning curve for Windows users, strong integration with Microsoft products (Active Directory, .NET applications), extensive corporate support.
- Cons: Requires purchasing licenses (can be expensive), generally requires more hardware resources than Linux, less commonly used for typical open-source web hosting stacks.
- Good for: Businesses heavily invested in the Microsoft ecosystem, specific Windows-only applications, learning Active Directory.
Microsoft Learn offers comprehensive guides for installing various Windows Server versions.
Linux (Ubuntu Server Recommended for Beginners)
Linux is a powerful, open-source operating system with many variations (distributions or ‘distros’). For beginners venturing into server setup, Ubuntu Server is frequently recommended.
- Pros: Free and open-source (no license cost), generally more lightweight (requires fewer resources), highly stable and secure, massive community support, excellent for web hosting (LAMP/LEMP stacks), command-line interface (CLI) focus promotes learning valuable skills.
- Cons: Can have a steeper learning curve, especially the command line, hardware compatibility can sometimes be trickier (though vastly improved).
- Good for: Web servers, file servers, home labs, learning server administration, cost-sensitive projects, self-hosting applications.
The consensus often points towards Linux, particularly Ubuntu Server, as the more flexible and cost-effective starting point for personal projects and learning.
Step-by-Step: Installing a Server Operating System
While the exact screens differ between Windows Server and Linux distros like Ubuntu, the general process of installing a server operating system follows these core steps:
[Hint: Insert image/video of creating a bootable USB drive here]Step 1: Obtain Installation Media
You’ll need the OS installer. Download the ISO file (a disk image) from the official source (Microsoft Evaluation Center for Windows Server trials, Ubuntu website for Ubuntu Server). Then, use software like Rufus (Windows) or BalenaEtcher (cross-platform) to create a bootable USB drive from the ISO file. You can also burn it to a DVD if your server has an optical drive.
Step 2: Boot from Installation Media
Insert the USB drive or DVD into your server. Power it on and access the BIOS/UEFI settings (usually by pressing keys like DEL, F2, F10, or F12 during startup). Configure the boot order to prioritize the USB drive or DVD drive over the internal hard drive. Save changes and reboot.
[Hint: Insert image/video of a typical BIOS/UEFI boot menu here]Step 3: Follow the Installer Prompts
The OS installer will now load. You’ll typically be guided through:
- Language, Time Zone, Keyboard Layout: Select your preferences.
- Installation Type: Choose whether to install the full OS or specific components. For beginners, the default full installation is usually best. Windows Server often offers “Desktop Experience” (GUI) or “Server Core” (command-line only). Ubuntu Server primarily uses a text-based installer but is quite intuitive.
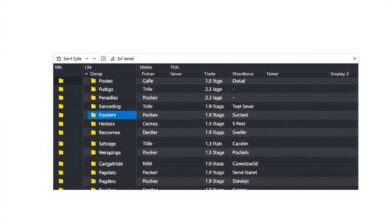
- Disk Partitioning: You’ll need to tell the installer where to install the OS. For a dedicated server with a single drive, using the entire disk is common. Be careful – this will erase existing data on the selected drive!
- User Account Creation: Set up an administrator username and a strong password.
Follow the on-screen instructions carefully. The installer will copy files and configure the system.
[Hint: Insert image/video showing OS selection and disk partitioning screens here]Step 4: Initial Configuration & Updates
Once the installation finishes and the server reboots (remember to remove the installation media or reset the boot order), you’ll perform initial setup:
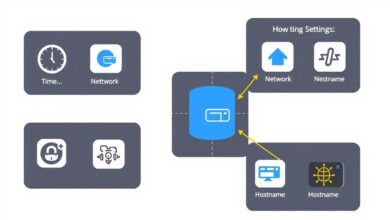
- Network Configuration: Ensure the server has network connectivity. This might be automatic via DHCP, or you might need to configure a static IP address.
- Install Updates: One of the first tasks is always to check for and install system updates to patch vulnerabilities and fix bugs.
- Basic Security: Configure the built-in firewall, ensure strong passwords are used.
Post-Installation: Next Steps
Congratulations! You’ve successfully completed the core task of installing a server operating system. Now what?
- Enable Remote Access: Set up SSH (Linux) or Remote Desktop (Windows) so you can manage the server without needing a physical keyboard and monitor attached.
- Install Necessary Services: Add the software needed for your server’s purpose (web server software like Apache/Nginx, file sharing like Samba, database software, etc.).
- Regular Maintenance: Keep the OS and software updated, monitor performance, and back up important data.
Installing a server OS is the foundational step in building powerful custom solutions. Whether you choose the familiarity of Windows Server or the flexibility of Linux like Ubuntu Server, taking the time to understand the process empowers you to create and manage your own server environment. For more ideas on what hardware to choose, check out our guide on choosing server hardware.
